Difference between revisions of "CNC Plasma Cutter"
Steve Owens (talk | contribs) |
Steve Owens (talk | contribs) |
||
| Line 34: | Line 34: | ||
Fusion 360 can be used to easily generate the G-code for our CNC Plasma Cutter. The following is some useful information that can get you started. | Fusion 360 can be used to easily generate the G-code for our CNC Plasma Cutter. The following is some useful information that can get you started. | ||
| + | |||
| + | |||
| + | Grab the following files, and upload them to your Fusion 360 account. For information on how to do this, you can view the following video. | ||
| + | |||
The first thing you want to do, is to make sure to grab the Post-Processor. This will ensure that your G-Code matches what our table needs to operate. This really just replaces the M3 with a pierce probe and adds an M5 to stop the torch. | The first thing you want to do, is to make sure to grab the Post-Processor. This will ensure that your G-Code matches what our table needs to operate. This really just replaces the M3 with a pierce probe and adds an M5 to stop the torch. | ||
| Line 42: | Line 46: | ||
*[https://a360.co/2QcDiYC .125 LeadIn with Kerf] | *[https://a360.co/2QcDiYC .125 LeadIn with Kerf] | ||
*[https://a360.co/2Q9IbBz No LeadIn or Kerf] | *[https://a360.co/2Q9IbBz No LeadIn or Kerf] | ||
| + | |||
Finally grab the tool files. | Finally grab the tool files. | ||
Revision as of 20:04, 4 December 2018
Consumables
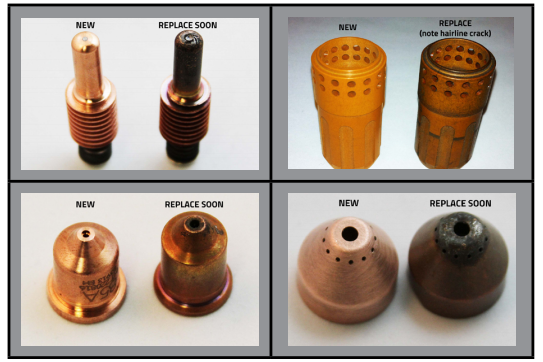
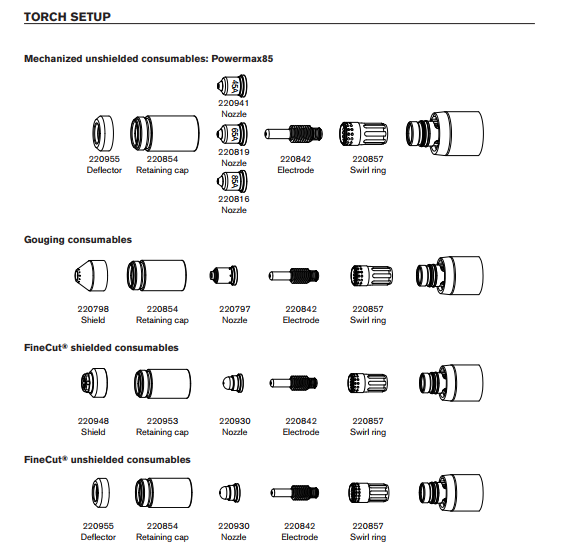
The main consumables a member will need to buy are
- Electrode - 220842
- 45A Tip - 220941
- 65A Tip - 220819
- 45A FineCut Tip - 220930
- FineCut Shield - 220948 (the finecut tip needs a different shield and it is not normally on the plasma)
The rest of the parts are already on the plasma.
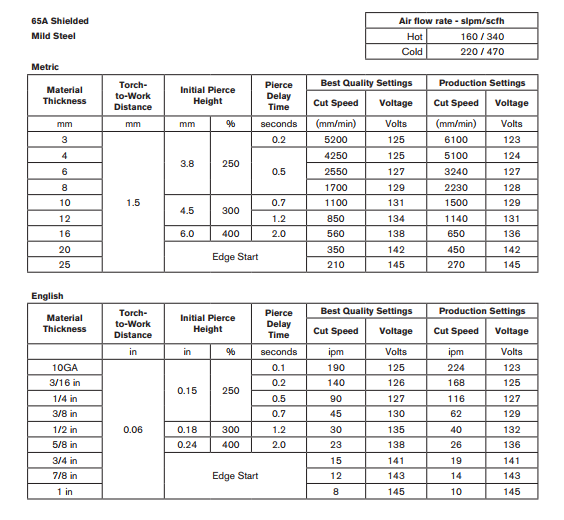
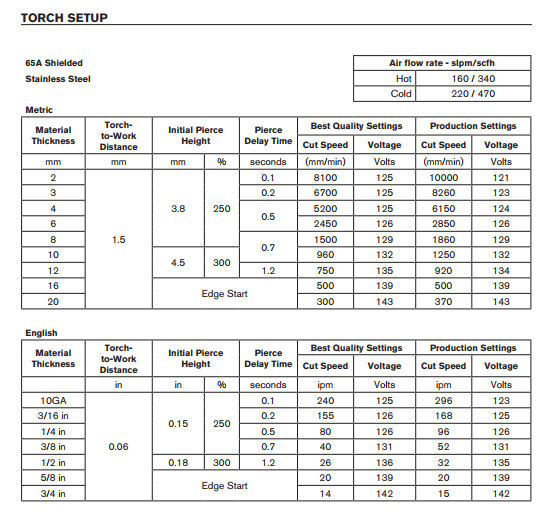
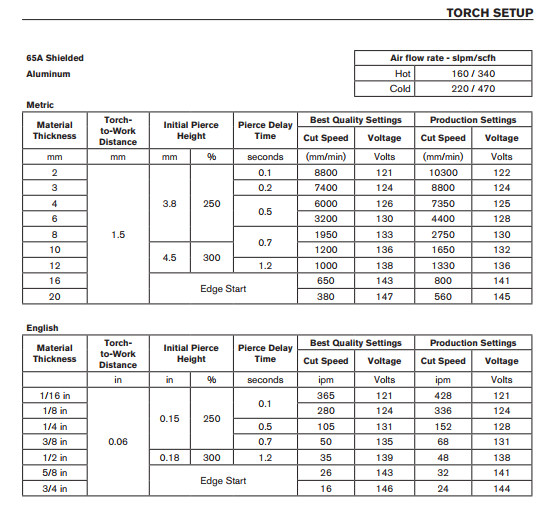
65 Specs
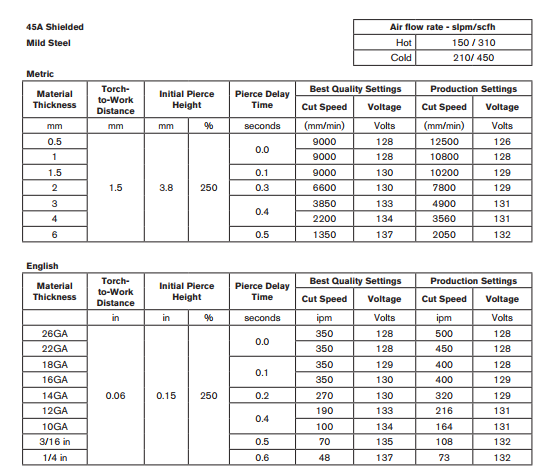
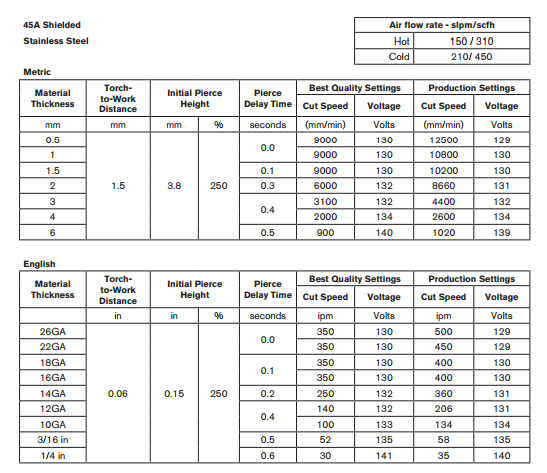
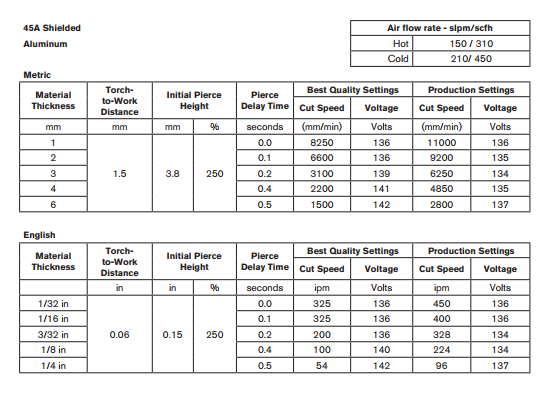
45 Specs
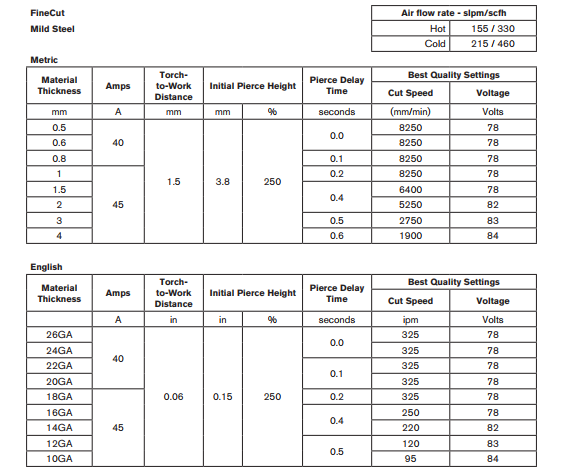
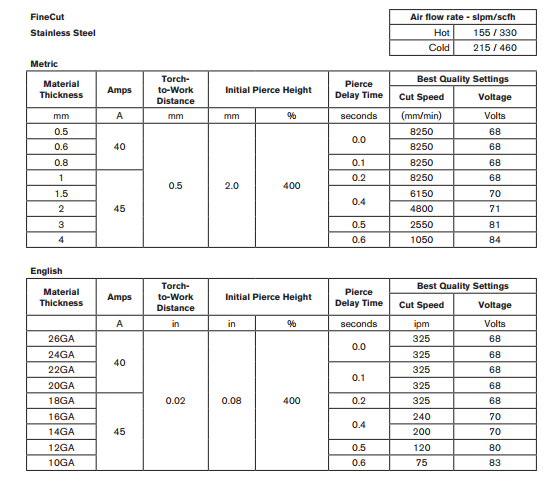
Finecut Specs
Fusion 360
Fusion 360 can be used to easily generate the G-code for our CNC Plasma Cutter. The following is some useful information that can get you started.
Grab the following files, and upload them to your Fusion 360 account. For information on how to do this, you can view the following video.
The first thing you want to do, is to make sure to grab the Post-Processor. This will ensure that your G-Code matches what our table needs to operate. This really just replaces the M3 with a pierce probe and adds an M5 to stop the torch.
You also want to grab the templates for our table. This is not required, but it will save you from having to track down all of the tool settings yourself.
Finally grab the tool files.
One easy way to get started is go grab an image or SVG. This instructional video will step you through the process.
Some basic point to verify:
- Start a new Model
- Select the X/Y plane (red/green)
- Make sure you used the Post-Processor, or you will run into troubles.
- Save your file to a flash drive.
- The file will be saved on your disk with an extension of .fgc. You will want to change it to .ngc so that the software will recognize it.
