PrintMaking
Contents
General Information
The Printmaking Studio is located in the middle of the building, east of the main classroom in a 250 sq/ft room. Equipment includes a washout booth, 4 head press, single print stations for paper and t-shirts, flash dryer, exposure table, and drying racks. The studio is available as a shared space and utilized by members to learn and experiment with printmaking processes that currently include screen printing and relief printing. Studio guidelines, safety and best practices should be followed to create a positive atmosphere for all members.
Marc Lujan is the Area Lead over Printmaking.
Access Policy
- Members using the printmaking studio are required to read the studio guidelines and have an understanding of use of equipment, materials and clean-up processes.
- During workshops, classes, etc. access will be limited due to space availability.
Approved by the board on October 10, 2016
Studio Guidelines
Guidelines will be updated periodically at the discretion of the Printmaking Area Lead.
- Clean up completely after every print session and leave the studio as you found it.
- Treat all members using the studio with respect and help create a positive and creative atmosphere
- Keep personal screens, ink and paper involved in a project to a minimum when using the studio - use the temporary shelving provided
- Do not store personal materials for an extended period within the studio when not involved with a printing project.
- Check with Area Lead before bringing in any printing equipment or donated materials
- We use water-based acrylic inks for screen printing - users should not bring outside cleaning chemicals or solvents into the studio
- Shared materials are available on the white bookshelf or other marked areas.
- Expendable studio materials (ink, paper, emulsion) should be used within reason. If you have a large project, you should purchase your own materials.
- Do not mix ink that is provided, please use colors straight from container and return the remainder to the jar, unmixed with other colors.
- Paper and basic ink is provided in the studio, t-shirts need to be purchased for use.
- Studio screens will be available with stencils already on them to print and will be marked for use
- Some studio screens will be available for individual use
- If studio equipment is damaged though negligence, it is recommended that members take responsibility and replace those items
- Write your name on tape and affix to studio screens when you are using them for a project, when finished, please reclaim for future use.
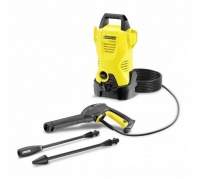
Pressure Washer
When using the pressure washer, use eye and ear protection. Do not place your hand in front of the wand at any time and keep the water spray directed into the washout booth. Follow these steps for turning on and off the water supply:
- Turn water on using the valve located on the front of the washout booth
- Turn the pressure washer on using the dial on it’s front
- When finished, reverse the procedure - turn off the pressure washer, turn off water at the valve
- Release pressure from the water line by triggering the wand
Equipment List
| Picture | What | Manufacturer | Model | Power | Status | Expert |
|---|---|---|---|---|---|---|
 |
Pressure Washer | Karcher | K2 Compact 1600 PSI | 110 | Working | Brad Ruder |
| [[File:|200px]] | Sheer Paper Cutter | OrangeA | 17 Inch A3 Patter Cutter | Manual | Working | Tim Collins |