Ceramics Area
Contents
General Information
The ceramics studio is an enclosed air conditioned space and is approximately 375 square feet. Scott Sullivan is the Ceramics Area Lead. Patrick Hutchison is the Ceramics Area Assistant Lead.
If you have questions, put a post on the forum, or send us an email: [maitlo:ceramics@makeict.org ceramics@makeict.org]
The Ceramics Process
Your clay project in the studio will involve several steps, start to finish. This will take several days or a couple weeks to complete depending on the time you have to work on the project, and how frequently the kiln is fired.
- Start Your Piece Using Wet Clay. There’s several ways to do this:
- Throwing on the Wheel - This is what most folks think of when they think of ceramics. Think Demi Moore and Patrick Swayze in Ghost.
- Hand Building - Grab a hunk of clay and start making something out of it! Think Playdough, but for adults who are kids at heart. You can shape it by hand, use tools to chop it up or carve designs in it, your imagination is the limit.
- Extrusion - Think Playdough Fun Factory. The extruder can be used to press clay into a shape which you can then further assemble into something cool, like a coil bowl.
- Slab Work - The slab roller takes a chunk of clay and flattens it to a consistent thickness (or you can use a rolling pin too!). You can use this slab of clay to assemble all sorts of pieces, including boxes, vases, cups, tiles, etc.. You can use cookie cutters, knives, and other tools to cut shapes and designs into your slab pieces. Again, your imagination is the limit.
- Trim and Finalize the Piece
- Let the piece you’ve made dry to the leather / leather hard stage. This can take up to a couple days, depending on the thickness of the piece, the temperature and humidity in the studio, and how tightly the piece is covered while drying. You’ll want to check on it every day or two to monitor it so you know when it is dry enough. At this point, you can easily trim, carve, clean up minor mistakes, and further refine the piece prior to the first firing.
- First Firing - Bisque Firing
- The first firing is the bisque firing. This firing removes the majority of the moisture from the piece and prepares it for glazing. Once bisqued, the piece is transformed into a stone-like substance that can no longer be wetted and turned back into wet clay or recycled.
- We bisque fire to Cone 04 (low fire).
- Apply Glaze
- After bisquing, the piece is very dry and will readily absorb glaze. You can paint glaze directly onto your piece, or you can dip part or all of your piece into a bucket of glaze. This stage is super fun and full of possibilities, as you can combine different glazes in creative ways to get really cool results.
- Second Firing - Glaze Firing
- This is the final firing which finishes your piece. This firing finishes the piece and the glaze melts and turns into a glassy coating on the surface.
- We glaze fire to Cone 5 (mid/high fire, not to be confused with 06 which is low fire).
Ceramics Studio Safety
Safety in the Ceramics Studio falls into two main areas. The first has to do with managing dust and the silica that is naturally present in clay. The second has to do with general tool and studio safety, most of which is common sense.
Clay Dust and Silica - What you Should Know
- Clay dust is very fine, much finer than normal household dust. Fine particles of clay dust containing silica can hang in the air for many hours or several days without filtration and/or circulating fresh air from outdoors. You cannot see the dust in the air, but it is still there.
- Long-term repetitive exposure to silica causes fluid buildup and scar tissue in the lungs that reduces your ability to breathe. This can lead to lung scarring and cough, weight loss, and fatigue.
- http://www.lung.org/lung-health-and-diseases/lung-disease-lookup/silicosis/
- While the risk is greatest for workers in industries handling silica containing materials, it is still important to minimize exposure in the ceramics studio.
How to Minimize Exposure to Dust and Silica in the Studio
- Dust control is key to minimizing exposure, and water is your friend. Wet clay doesn’t make dust and is harmless. Follow these tips to help mitigate exposure to yourself and your fellow ceramicists (remember, dust can hang in the air for a very long time):
- Don’t sweep the floor in the ceramics studio! The floor should be wet mopped to pick up and remove dust from the floor.
- Use a damp sponge to clean up work tables and surfaces, rinsing frequently to remove dust from the sponge.
- Trim your pieces while they are still in the leather / leather hard stage. If your piece has dried beyond that stage and you still wish to trim / sand the piece, be sure and do so outdoors with the wind at your back.
- Wear a tight fitting mask or respirator when doing work that produces dust.
General Studio Safety Guidelines
- As in the rest of the Makerspace: Be Not on Fire
- Keep safely away from the kiln while in operation
- Do not look into the kiln while in operation without protective glasses
- Don’t leave tools, especially pointy sharp ones, in buckets of water or the sink
General Ceramics Studio Policies
In order to meet our MakeICT credo of Be Excellent to Each Other, we ask that all users of the ceramics studio adhere to the following:
- Cleaning
- Please leave the studio cleaner than you found it.
- As always, be careful that you are not creating dust while cleaning, but picking it up with a wet sponge or mop.
- Clean any tools or equipment that you use and put them away or on the drying rack as appropriate.
- Clean any bits of leftover clay, etc., off of the work tables using the large sponge so they are ready for the next person to use. Get the sponge wet, wring it out well, and wipe down the surface. Rinse the sponge frequently, being sure to wring it out well so that you don’t over-wet the surface so it has to dry for a very long time.
- Look and pick up any loose bits of clay that fall on floor around the area you are working before you leave and toss them in the trash (not the recycling). Doing so while the clay is still wet means those bits of clay don’t dry and create dust in the future as people walk on them.
- The floor should only be wet mopped to remove dust and clay build up. Do not use a broom on the floor. The mop bucket is located in the front closet between the bathrooms.
- Sink / Sink Drain
- Take extra care not to allow large amounts of clay to go down the sink drain. We have a trap on the drain to catch clay so we don’t clog the drain, but the best way to avoid clogging the drain, is to avoid letting lots of clay go down the drain in the first place.
- Used Clay Recycling
- We recycle Cone 5-6 (mid/high fire) B-mix clay used in the studio. This recycled clay is used for Ceramics Nights events, and is generally available for free for anyone to use to experiment and learn how to work with clay in the studio. Read more about the type of clay used in the studio below in the Consumables section.
- Put your over-dry or mostly dry pieces of clay in the large black disk on the recycling table. Examples would be a bowl you were throwing on the wheel that didn’t turn out, a leather hard piece you don’t want to keep and bisque or the trimmings from your leather hard pieces.
- Put slip and really wet / sloppy bits of clay into the bucket in or underneath the sink.
- Storing Personal Belongings
- We have very limited storage space in the studio. Personal belongings, such as a tool bucket or bag of clay can only be left on the wooden shelves on the west wall by the door.
- All items left in the studio must have your name on them. Anything left in the studio without a name on it is free for public use and/or recycling.
- Leaving Work Pieces Too Long
- We have very limited storage space for works-in-progress. Pieces left in the studio for more than 30 days will become property of the studio and may be recycled, disposed of, or finished and sold at consignment to benefit the studio. It is the members responsibility to check on the status of work pieces and collect them after firing. We will post on the official Make ICT forum each time we fire the kiln, including pictures when possible, to serve as notice pieces are ready.
- Identification of Work Pieces
- Work pieces should be identified while in the studio:
- Greenware (un-bisqued pieces in progress or drying) - Put your name and the date on a piece of masking tape and place it on the drying board or bat that your piece is drying on while on the shelves.
- Bisqueware (bisque fired pieces ready to be glazed) - Before you fire your pieces, unless it is impractical because of the design or size of the piece, you should put your name / makers mark on the bottom of your piece.
- Work pieces should be identified while in the studio:
Tools / Consumables
Allowed Clay
- We use Cone 5-6 (mid/high fire) B-mix clay in the studio. We recycle clay used in the studio to be frugal and awesome. Please don’t bring in outside clay or unknown clay types into the studio because it can contaminate the clay we are recycling yielding unexpected results or failure in the kiln. To make this easy for everyone, we have 25 pound blocks of clay available for purchase in the studio for $10 each. We buy this clay from Evan’s Ceramics for $12, and sell it to you for $10. We don’t consider this a loss because of our recycling system, since we get to use that recycled clay again and again.
- You are welcome to buy Cone 5-6 B-mix clay from Evan’s Ceramics and bring it to use if you like, just remember we sell the same for $2 less per bag in the studio.
- You can bring in and use other clays which fire to Cone 5-6, such as a red clay body, however you need to follow these guidelines:
- Do not work directly with colored clay on the work tables. There is a special canvas covered work board for you to use to prevent colored clays from contaminating the work tables.
- Do not put outside / colored clay into the recycling buckets. It will contaminate the recycled clay making it unusable for others.
- Be sure and clean and rinse tools used with outside / colored clay separate from the rinse and slip buckets in the sink, since some of that clay may enter the recycling stream.
Allowed Glaze
- Several glazes are made available in the studio for use. Glazes are not free. Glazes cost 75 cents per ounce. Make payment in the blue payment box.
- There are small 3oz plastic Gladware type containers in the cabinet you can use to measure out an ounce or two of glaze at a time to use on your pieces. Clean and leave them to dry when you are done using them. This makes it easy to figure the cost of the glaze you use.
- To prevent contamination, please don’t pour used glaze back into the original containers. You can always add more glaze to your plastic painting cup if you run low. Excess glaze can be kept in your painting cup, just put the lid on tightly and label it with masking tape which number glaze it is or if it’s a mix, so others can use it.
- We fire everything to Cone 6 (remember 06 is not 6), so most glazes that fire to Cone 6 are perfectly fine to bring in and use on your pieces. If you’re shopping at Evan’s Ceramics, be sure and read the bottle the glaze came in and see that it says Cone 6 on it, and the instructions don’t have any special requirements for temperature or timing / hold times. Most all of the high-fire glazes there can be used here, and we buy our glazes there.
- Low-fire glazes can be used as under glazes, with a layer of high-fire clear or other glaze over the top, to come up with interesting patterns and effects on your pieces. There is a selection of low-fire glazes available in the cabinet, which are free to use until they run out.
Bags / Paper Towels
- Bags to cover your pieces are available in the cabinet. It’s great to reuse bags, however when they start to get a heavy coating of clay on them it’s time to get a new one to help control dust.
- Paper Towels are provided, please use them sparingly to help control costs.
Tools
- All the tools you need to work on your project are provided in the studio. You can bring your own of course. Community tools are located under the work tables and on the metal shelves by the cabinet. Be sure and clean everything and put it on the drying rack when you are through.
Resources
Glaze Sample Tiles
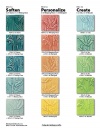
We are building a library of sample tiles to show what different glazes look like. This will help folks, especially first timers, get an idea of what the finished glaze will look like on their work. The tiles are hung up in the studio on the east wall rack and you can reference the spreadsheet to see the details about the glaze used.
Mixing / Layering Glazes
There are endless variations possible, and lots of stunning results can be had, when layering or mixing glazes.
- Layering - While there is no way to truly predict how glazes react and act in the kiln, you can get some ideas of successful layering combinations by checking out some of the layering charts in the studio, or taking a look at the Glaze Layering page on the AMACO website (most of the glazes we make available in the studio are AMACO glazes). Their page is interactive, letting you pick the top and bottom glazes to find sample images.
- Mixing - When it comes to mixing, anything is possible and the outcomes can be rather unpredictable. The adventure is yours! If you turn out some really fine examples and want to share, post them to the forum to share!
- Lightening - If you want to lighten one of the AMACO Celadon glazes, you can use the AMACO Mixing Clear, glaze #23 on our chart. Refer to the Soften section on this flyer for examples of the percent mix to achieve the lightening results.
Great YouTube Channels
- Ceramic Arts Daily - Short technique tutorials and artist interviews.
- Simon Leach - All sorts of ceramics, with an accent!
- Hsinchuen Lin - Remarkable pottery and detailed instruction videos.
- Earth Nation Ceramics - Focused on beginner and new potters, with a sense of humor.
- Jon the Potter - Lighthearted take on reproducible art for sale.
Places to Shop Local
Ceramics Studio Access Policy
Members in good standing and their supervised guests may use the ceramics studio whenever it is not previously reserved for classes. Classes will be posted to the official Make ICT calendar. Instructors may, at their sole discretion, allow others to use the studio while class is in session.
Members are encouraged to use the studio on Maker Monday’s and Ceramics Night if they are willing to demonstrate techniques and answer questions about their work to folks visiting the studio. However, keep in mind, these are busy nights in the studio so space will be limited. If you want to be a regular demo artist for one of these nights, please contact the studio leads!
Per MakeICT policy, children under the age of 16 must be supervised by an adult at all times.
Specific Equipment Authorization
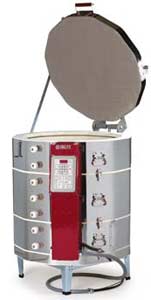
- Running the kiln requires special training and authorization.
- Use of the following equipment requires instruction by an approved authorizer:
- Wheels
- Extruder
- Slab Roller
- Dip Glazes
- Hand tools found in the studio are available for use with no authorization.
Peer Authorization
If you wish to be listed as a contact for peer authorizations on the above listed equipment, please contact the studio leads. Peer Authorized Trainers need to meet with and review policies, operation, and cleanup with the studio leads and agree to abide by their recommendations.
Kiln Operation
Operation of the kiln is limited to the Ceramics Studio Lead, Assistant Lead(s), and their designees. People who are authorized to use the kiln understand, meet, and accept the following requirements:
- Difference between bisque and glaze firing and the Cone firing table
- Correct operation of the electronic kiln control panel
- Proper loading of the kiln to ensure best possible results
- Proper handling and use of kiln furniture
- Cleaning and maintenance of kiln and kiln furniture
- Ability to identify pieces that should not be fired and possible resolutions to suggest to members when pieces are rejected
- Ability to log and communicate firings to the studio membership


